IoT found a new home, the Snowflake Cloud Data Platform (Part 1)
There are multiple use cases where you need to combine ERP, PLM and IoT data to produce valuable business insights.
- Proactive and predictive maintenance - with IoT coming from the product but also from maintenance tooling
- Product testing analysis - with IoT coming from the live testing of the product
- Fabrication supervision and optimisation - with IoT coming from the shop floor
- Anomaly lineage - with IoT from in service product
The challenge is still that these data live in silos sometimes in different divisions or even collected by third parties and the sources are structured and semi-structured.
Snowflake can act as a single source of truth combining the structured data sources (ERP, PLM) with IoT coming from all stages of the product lifecycle.
The Snowflake Cloud Data Platform is able to load and process structured and semi-structured data (including IoT) at a massive scale. 
Combined with the unique Snowflake data sharing capability, it's also possible to share these data without having to export them. Tests mesures or fabrication events can be shared from and to third parties without having to perform costly exports, ingest and transform to get the data back into another system. The third party will access the data as a view and as if it was in their own environment and can combine it with its own dataset to produce new insights. I'll come back to this capability in another blog post.

The illustration
For this first post dedicated to Snowflake, I will start will something fun. The objective here is to illustrate how to load and query json IoT data at scale using the Snowflake Kafka connector. In a second blog the objective will be to train a model based on this data to perform anomaly detection.

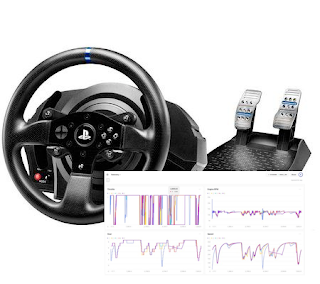
- A racing wheel (Actually not mandatory but better with one)
- A console or any other device able to run F1 2019+ game
- A PC
- And a Snowflake account (trial account is a perfect fit)
- + nodejs and Kafka
Setup the telemetry capture
The UDP packet listener
F1 201X can produce live telemetry with UDP packets broadcasted to your local network.
If you are interested, the UDP specs is available here :
https://forums.codemasters.
https://forums.codemasters.
In order to capture these data, it's better not to reinvent the wheel. So here is an open source project that can do it for you:
https://github.com/jonybur/f1-telemetry-client
So in order to have all up and ready, you can create a new folder for the project and run from within.
npm install -g typescriptnpm install f1-telemetry-clientnpm install json-bigintNote : The telemetry client produces Json with bigint that require a dedicated library for serialisation.
Now we can create a JavaScript client that will capture the data from UDP and write the corresponding Json to a Kafka topic. Below is a simple implementation to do that:
Capture.ts
import { F1TelemetryClient, constants } from "f1-telemetry-client";
var JSONbig = require('json-bigint');
const { PACKETS } = constants;
const { Kafka } = require('kafkajs')
const kafka = new Kafka({
clientId: 'carTelemetry',
brokers: ['localhost:9092']
})
const producer = kafka.producer()
const fs = require('fs');
const client = new F1TelemetryClient({port: 20777});
client.on(PACKETS.event, saveEvent);
client.on(PACKETS.motion, saveMotion);
client.on(PACKETS.carSetups, saveCarSetups);
client.on(PACKETS.lapData, saveLapData);
client.on(PACKETS.session, saveSession);
client.on(PACKETS.participants, console.log);
client.on(PACKETS.carTelemetry, saveCarTelemetry);
client.on(PACKETS.carStatus, saveCarStatus);
client.on(PACKETS.finalClassification, saveFinalClassification);
client.on(PACKETS.lobbyInfo, saveLobbyInfo);
function writeToTopic(eventType,data){
producer.send({
topic: eventType,
messages: [
{ value: JSONbig.stringify(data) },
],
})
}
function saveEvent(data){
writeToTopic("event",data)
}
function saveMotion(data){
writeToTopic("motion",data)
}
function saveCarSetups(data){
writeToTopic("carSetups",data)
}
function saveLapData(data){
writeToTopic("lapData",data)
}
function saveSession(data){
writeToTopic("session",data)
}
function saveCarTelemetry(data){
writeToTopic("carTelemetry",data)
}
function saveCarStatus(data){
writeToTopic("carStatus",data)
}
function saveFinalClassification(data){
writeToTopic("finalClassification",data)
}
function saveLobbyInfo(data){
writeToTopic("lobbyInfo",data)
}
As the code is TypeScript you must run the following command to compile to the executable js file
tsc Capture.tsFrom Kafka to Snowflake
With the previous step we write IoT messages from the game to Kafka topics. Now we need to setup the Snowflake Kafka connector in order to forward these messages to Snowflake.
From the perspective of Snowflake, a Kafka topic produces a stream of rows to be inserted into a Snowflake table. Thanks to the connector configuration, tables are automatically created in order to store the data from a topic. By default the table will have the same name as the topic but a topic can also be mapped to different table names. The workflow is available in the Snowflake documentation.
The table has the following definition:
- RECORD_CONTENT. This contains the Kafka message.
- RECORD_METADATA. This contains metadata about the message, for example, the topic from which the message was read.
RECORD_CONTENT is a VARIANT and can store the json message as is.
Kafka connector configuration
In order to connect Kafka to Snowflake, you will have to setup the kafka connector.
Below is the configuration I use, you can see there is one topic per F1 2019 message type,
the authentification is configured using key pair authentication, the database use is Telemetry with the public schema, and last point is the SnowflakeJsonConverter in order to process the message as a Json document.
connect-standalone.properties
bootstrap.servers=localhost:9092
offset.storage.file.filename=/tmp/connect.offsets
name = snowkafka
connector.class=com.snowflake.kafka.connector.SnowflakeSinkConnector
tasks.max=8
topics=carSetups,carStatus,carTelemetry,event,finalClassification,motion,lapData,session,lobbyInfo
buffer.count.records=10000
buffer.flush.time=60
buffer.size.bytes=5000000
snowflake.url.name=XXXXXXXXXX.snowflakecomputing.com:443
snowflake.user.name=XXXXXXXXXX
snowflake.private.key=XXXXXXXXXX
snowflake.private.key.passphrase=XXXXXXXXXX
snowflake.database.name=telemetry
snowflake.schema.name=public
key.converter=org.apache.kafka.connect.storage.StringConverter
value.converter=com.snowflake.kafka.connector.records.SnowflakeJsonConverter
Let's start your engine
You are now ready to race.
First you'll have to start Kafka and the JavaScript client.
You can start the following Kafka command in consoles:
./bin/zookeeper-server-start.sh config/zookeeper.properties./bin/kafka-server-start.sh config/server.properties./bin/connect-standalone.sh ./config/connect-standalone.properties ./config/connect-standalone.propertiesAnd the JavaScript client
node capture.jsYou can now start F1 2019 (or other version if you have a compatible client API). You will have to activate telemetry. The procedure can be find on the following page: https://www.simracingtelemetry.com/help/F12019/
I advice to set explicit IP address of you PC in the game and potentially check your firewall rules to make sure UDP packets will be accessible from the JavaScript client.
As soon as you play, the game will broadcast the telemetry that will automatically be captured and sent to Kafka by the JavaScript client. From there, the Snowflake Kafka connector will forward the message to the corresponding tables automatically.

So you can race for a while, alone or with competitors. Note that if you play a race, the telemetry from all the cars will be broadcasted. With few laps you should get the equivalent of 500K messages loaded into Snowflake (566K in my case).
And here is what you should see in the snowflake Console: all tables created with the messages stored inside.

If you look at the records in the Snowflake Console they will look like this :

It's time to go back to the garage and check what was captured.
Telemetry Data visualisation in Snowflake
Flatten nested arrays
If you look at the data structures, you'll see that the records contain global metadata and an array containing the metrics of each individual car. In order to make analysis simpler, we will flatten these arrays.
Snowflake can manipulate the json with almost the same performance as if it was a standard table. So instead of transforming everything we will only create a view on existing table.
For exemple, the CARTELEMETRY table contains a m_carTelemetryData nested array (which itself has nested arrays).
{
"m_buttonStatus": 0,
"m_carTelemetryData": [
{
"m_brake": 0,
"m_brakesTemperature": [
33,
33,
33,
33
],
"m_clutch": 0,
"m_drs": 0,
"m_engineRPM": 4318,
"m_engineTemperature": 90,
"m_gear": 0,
"m_revLightsPercent": 0,
"m_speed": 0,
"m_steer": 0,
"m_surfaceType": [
0,
0,
0,
0
],
"m_throttle": 0,
"m_tyresInnerTemperature": [
89,
89,
89,
89
],
"m_tyresPressure": [
21.5,
21.5,
23,
23
],
"m_tyresSurfaceTemperature": [
89,
89,
89,
89
]
},
],
"m_header": {
"m_frameIdentifier": 0,
"m_gameMajorVersion": 1,
"m_gameMinorVersion": 22,
"m_packetFormat": 2019,
"m_packetId": 6,
"m_packetVersion": 1,
"m_playerCarIndex": 19,
"m_sessionTime": 0.0389254167675972,
"m_sessionUID": 9863384974673893955
}
}
With the following query, we assign the carId to the corresponding json property in the nested array.
CREATE VIEW CARTELEMETRY_V AS
SELECT RECORD_CONTENT:m_header:m_frameIdentifier as m_frameIdentifier,RECORD_CONTENT:m_header:m_sessionTime as m_sessionTime,
INDEX as m_carId,
VALUE:m_brake as m_brake,
VALUE:m_brakesTemperature[0] as m_brakesTemperature0,
VALUE:m_brakesTemperature[1] as m_brakesTemperature1,
VALUE:m_brakesTemperature[2] as m_brakesTemperature2,
VALUE:m_brakesTemperature[3] as m_brakesTemperature3,
VALUE:m_clutch as m_clutch,
VALUE:m_drs as m_drs,
VALUE:m_engineRPM as m_engineRPM,
VALUE:m_engineTemperature as m_engineTemperature,
VALUE:m_gear as m_gear,
VALUE:m_revLightsPercent as m_revLightsPercent,
VALUE:m_speed as m_speed,
VALUE:m_steer as m_steer,
VALUE:m_surfaceType[0] as m_surfaceType1,
VALUE:m_surfaceType[1] as m_surfaceType2,
VALUE:m_surfaceType[2] as m_surfaceType3,
VALUE:m_surfaceType[3] as m_surfaceType4,
VALUE:m_throttle as m_throttle,
VALUE:m_tyresInnerTemperature[0] as m_tyresInnerTemperature0,
VALUE:m_tyresInnerTemperature[1] as m_tyresInnerTemperature1,
VALUE:m_tyresInnerTemperature[2] as m_tyresInnerTemperature2,
VALUE:m_tyresInnerTemperature[3] as m_tyresInnerTemperature3,
VALUE:m_tyresPressure[0] as m_tyresPressure0,
VALUE:m_tyresPressure[1] as m_tyresPressure1,
VALUE:m_tyresPressure[2] as m_tyresPressure2,
VALUE:m_tyresPressure[3] as m_tyresPressure3,
VALUE:m_tyresSurfaceTemperature[0] as m_tyresSurfaceTemperature0,
VALUE:m_tyresSurfaceTemperature[1] as m_tyresSurfaceTemperature1,
VALUE:m_tyresSurfaceTemperature[2] as m_tyresSurfaceTemperature2,
VALUE:m_tyresSurfaceTemperature[3] as m_tyresSurfaceTemperature3
FROM "TELEMETRY"."PUBLIC"."CARTELEMETRY", lateral flatten( input => RECORD_CONTENT:m_carTelemetryData )
Here we do the same with the MOTION table
CREATE VIEW MOTION_V AS
SELECT RECORD_CONTENT:m_header:m_frameIdentifier as m_frameIdentifier,
RECORD_CONTENT:m_header:m_sessionTime as m_sessionTime,
INDEX as m_carId,
VALUE:m_gForceLateral as m_gForceLateral,
VALUE:m_gForceLongitudinal as m_gForceLongitudinal,
VALUE:m_gForceVertical as m_gForceVertical,
VALUE:m_pitch as m_pitch,
VALUE:m_roll as m_roll,
VALUE:m_worldForwardDirX as m_worldForwardDirX,
VALUE:m_worldForwardDirY as m_worldForwardDirY,
VALUE:m_worldForwardDirZ as m_worldForwardDirZ,
VALUE:m_worldPositionX as m_worldPositionX,
VALUE:m_worldPositionY as m_worldPositionY,
VALUE:m_worldPositionZ as m_worldPositionZ,
VALUE:m_worldRightDirX as m_worldRightDirX,
VALUE:m_worldRightDirY as m_worldRightDirY,
VALUE:m_worldRightDirZ as m_worldRightDirZ,
VALUE:m_worldVelocityX as m_worldVelocityX,
VALUE:m_worldVelocityY as m_worldVelocityY,
VALUE:m_worldVelocityZ as m_worldVelocityZ,
VALUE:m_yaw as m_yaw
FROM "TELEMETRY"."PUBLIC"."MOTION", lateral flatten( input => RECORD_CONTENT:m_carMotionData )
LAPDATA is also important as it gives per frameIdentifier the lap distance which is quite useful to align mesures that happen at a given place in the track:
CREATE OR REPLACE VIEW LAPDATA_V AS
SELECT RECORD_CONTENT:m_header:m_frameIdentifier as m_frameIdentifier,
RECORD_CONTENT:m_header:m_sessionTime as m_sessionTime,
INDEX as m_carId,
VALUE:m_lapDistance as m_lapDistance
FROM "TELEMETRY"."PUBLIC"."LAPDATA", lateral flatten( input => RECORD_CONTENT:m_lapData )
You can then do the same with other types of telemetry records.
Building a data visualisation
As soon as you have the different views, you can easily build visualisations in Snowsight.
The different record types share a common key called m_frameIdentifier. You can so joined the records on m_frameIdentifier and m_carId in order to get a 360 of the car telemetry (merging carTelemetry and motion for exemple to get in car IoT with physical metrics of the car.
SELECT * FROM "TELEMETRY"."PUBLIC"."CARTELEMETRY_V" ct
JOIN "TELEMETRY"."PUBLIC"."MOTION_V" m ON ct.m_carId=m.m_carId and m.m_frameIdentifier=ct.m_frameIdentifier
JOIN "TELEMETRY"."PUBLIC"."LAPDATA_V" ld ON ct.m_carId=ld.m_carId and ld.m_frameIdentifier=ct.m_frameIdentifier;
Below is an exemple :

What's next ?
In an upcoming blog post, I'll come back to these data in order to illustrate how to connect Dataiku to this dataset to perform some more advanced data science processing.